I'll have an insulin shot to go, please.


I got LOTS of emails after I posted about the delicious carb-coma inducing bread that I make.

And none of them hate mail, surprisingly.

Seems that all of you like bread as much as me.

I, myself, have serious bread issues. I am incapable of eating bread that comes from the grocery store. I think it tastes nasty, has no real flavor, and the texture reminds me of cardboard.

I mean, if I'm going to give up taste, I might as well just eat healthy foods and toss out the cookie dough.

Bwaaahhhh! As if.

ANYhoo, I posted a few years ago (can't find the post or I'd link) about the beautiful bread machine that had changed my life (and put my local Great Harvest out of business). After making multiple loaves per week for a couple of years, the poor thing died about a month ago. Not wanting to rush out and spend a few hundred bucks the month before Christmas on an appliance of all things, I started to experiment with making my own bread. I tried several recipes and each received two greasy thumbs up from the people around here.

This recipe was settled on as a favorite, and I've been making it ever since. It takes maybe eight minutes of my time, and then sits on the counter and does all the work by itself. Every few days, I make another couple of loaves. It's delicious and I'm in love with it.

And since I know you will be, too, here is the recipe in my favorite form: photo.

May your thighs thank you, as mine have.


Join me in my diabetic heaven, will you?

BEST. CAKE. EVER.

Tap. Tap. Is this thing on? Anybody out there?

Well, I am back from my unplanned and very annoying hiatus. You will be happy to know that Mack is back in school and fully recovered. (Although I did hear today that one of the schools in our district has 18 percent of the student body out due to the swine flu. Makes me wonder how all the rest of us escaped unscathed?)

ANYhoo, I have decided to share with you one of my absolute favorite treats. I helped throw a baby shower this week and thought it was the perfect opportunity to get my cake on.

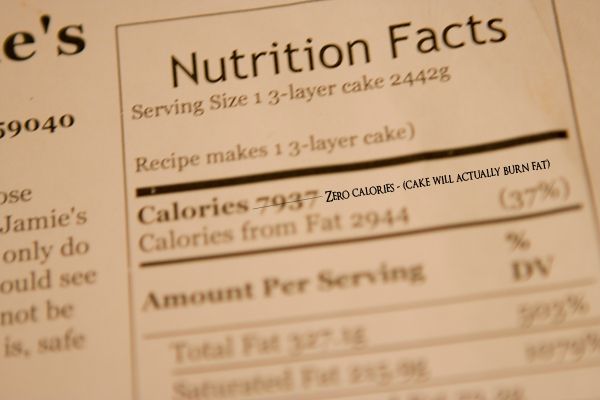
The sweetness of the cake, however, was momentarily ruined when the husband glanced at the recipe on the counter and commented out loud on the number of calories in the cake.

I know, right?

That was quickly remedied by me:

I found this recipe about a year ago, and it actually belongs to the fabulous Paula Deen, but I borrowed it, tweaked it a little bit, and can safely assume it is the reason I cannot button my jeans today.

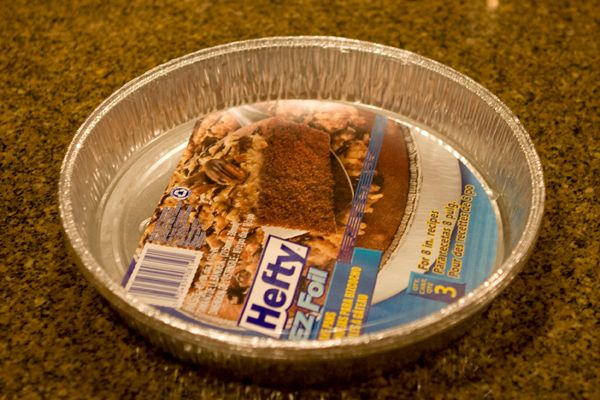
First you need three cake pans. I use the classy, no-washing-needed version seen here. Generously grease and flour these babies and set them aside.

Then you take 1 cup butter, which is supposed to be at room temperature - a step I somehow always forget to do ahead of time. The microwave does a great job, and if you accidentally forget to pull the butter out in time, it works just fine if it's a little melted, too.

Cream the melted room temperature butter and 2 cups of sugar for six to eight minutes. Then add four eggs, one a time, beating well after each addition.

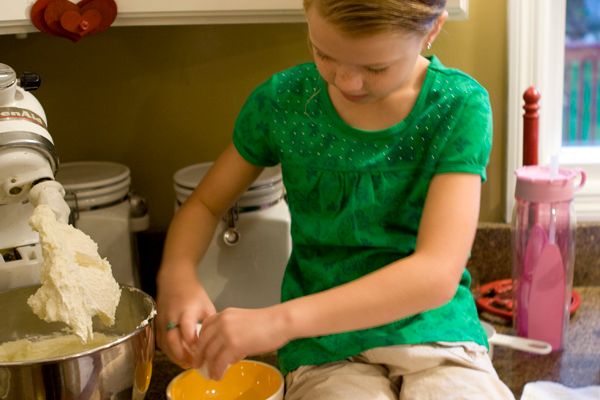
There is a little person in our house that has a sixth sense for when the kitchen aid is on. She is like one of Pavlov's little dogs - she hears that humming and she comes a running. Once in a while I'm nice and let her crack the eggs.

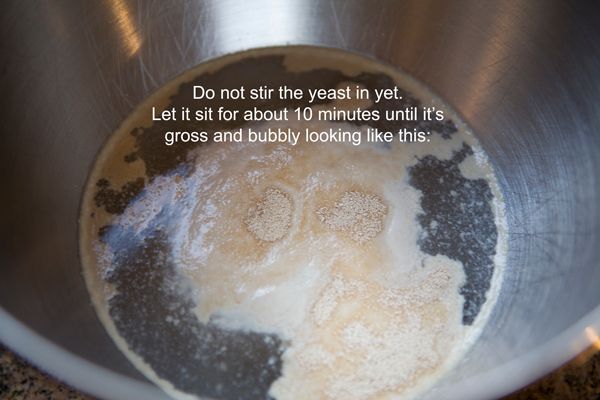
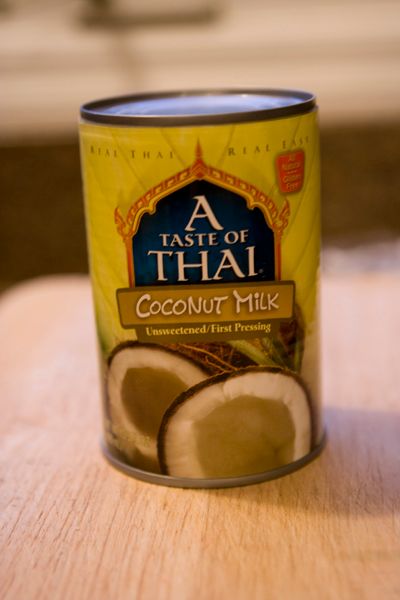
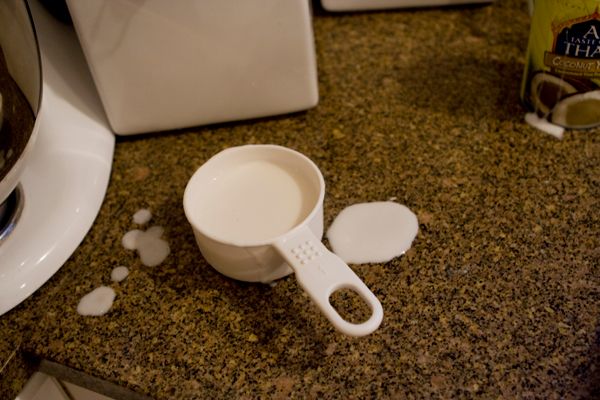
Add one teaspoon of vanilla and mix just until combined. Then you're going to take one cup of coconut milk:

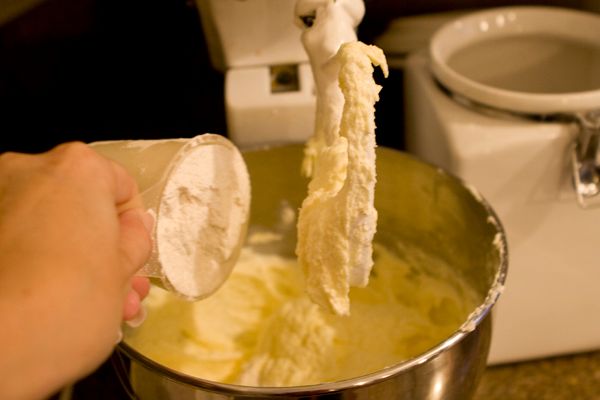
And 3 cups flour. Add them alternately to the creamed mixture, beginning and ending with the flour.


Lots of times when I'm baking, things look like this, which is always hard for my OCD brain to ignore:

When you're done, the batter will be very, very thick. Almost cookie dough like. But don't worry, you've definitely done it right if it looks like this. If it's thin and cake-batter like? I don't know how to help you. You might want to consider professional help and get your baked goods on the outside.

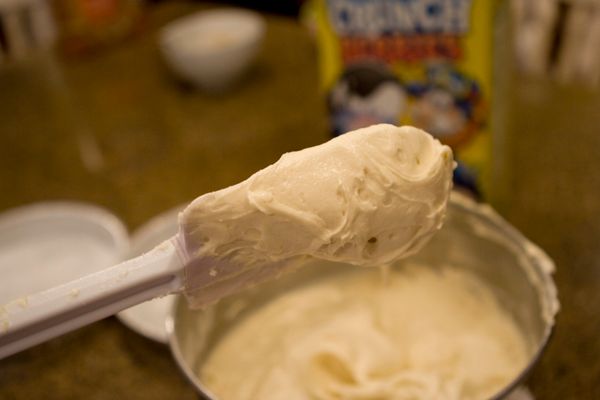
Next, pour the batter into your three greased pans (ignoring, of course, the disgusting Crunch Berries cereal on the counter. In my defense, it was only a little after seven a.m. when I made this and breakfast was not fully put away yet. See the clock on the wall for proof.)

Once the batter is spread around each pan, lift them up off the counter and slam them back down to pop any air bubbles. Yes, people, this is going to be a dense cake. Lovely, dense, and incredibly moist.

Slam the cake pans, at least four or five times each, until all the air bubbles are released. Bake at 350 for 30 minutes or until done.

Cool five minutes or so in the pan, and dump the cakes onto a cooling rack to cool while you prepare the frosting. When I'm not feeling lazy, I like to use the Wilton buttercream frosting recipe. But I have to confess, I have just made this with frosting in a can, and it by no means impacts the deliciousness.

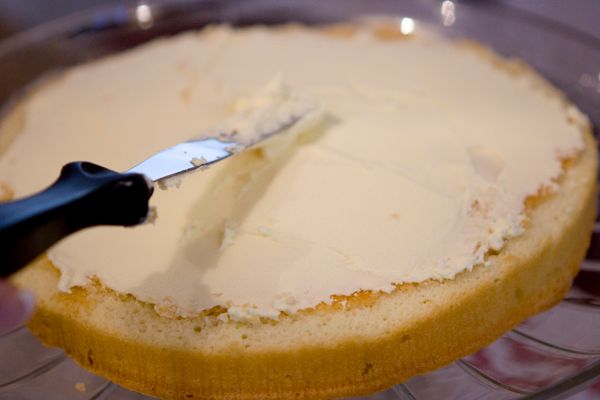
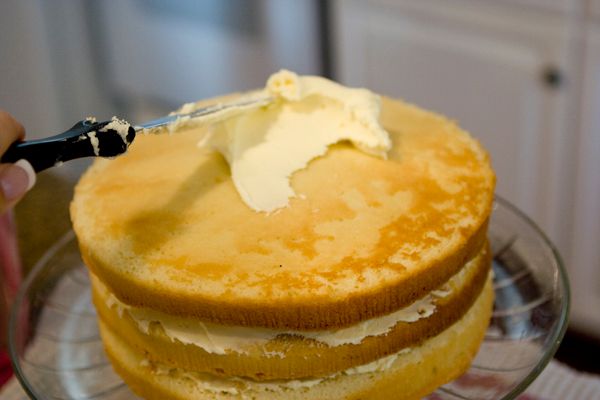
Next, spread some frosting over your first layer like this:

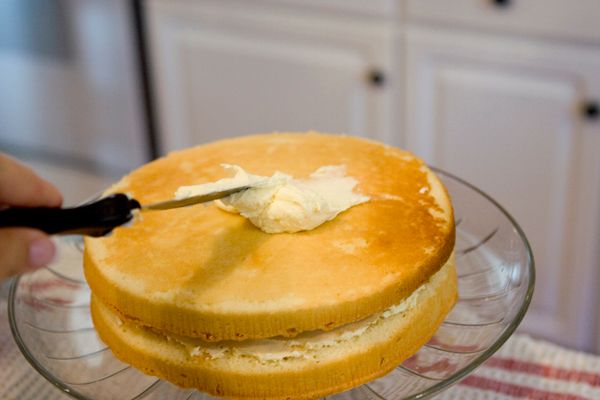
Top that layer with the middle child, I mean, middle layer, and slather that bad boy with some frosting of his own.


Repeat again for the third layer. Do not be alarmed by the imperfect appearance or unevenness of the layers. All will be made right by the coconut. You must trust the little Stie. Has she ever steered you wrong before?

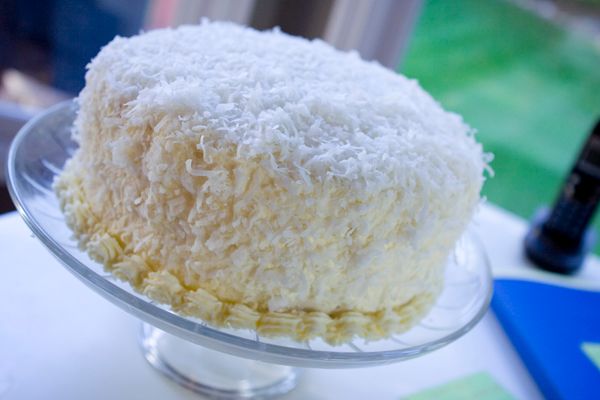
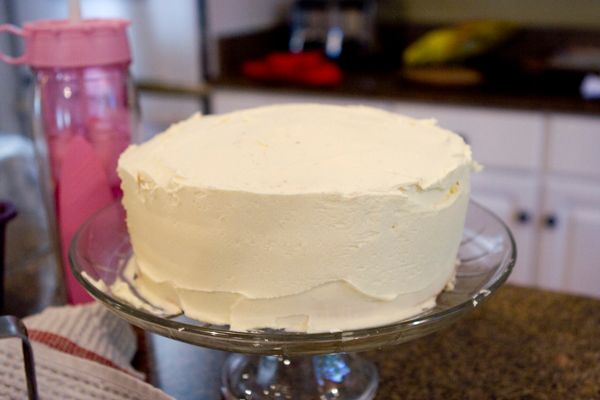
When you have finished frosting all layers and the edges, it will look like this:

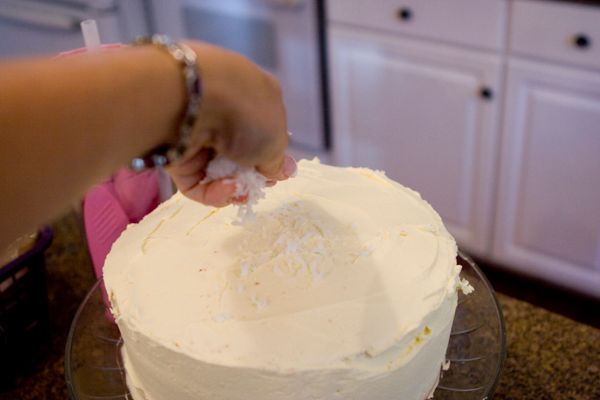
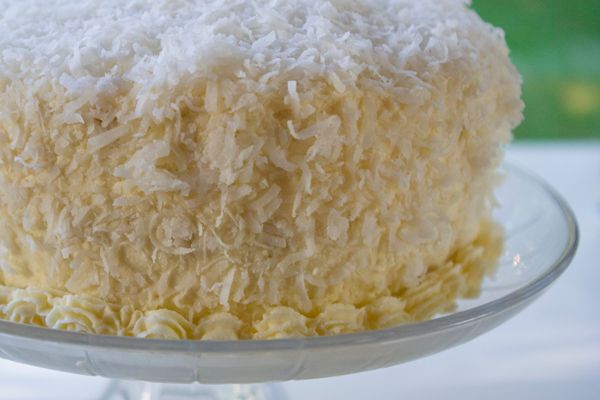
Sprinkle coconut over the top, covering any and all mistakes.

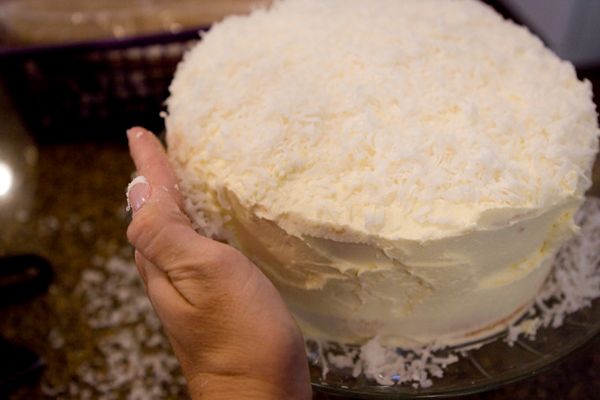
Pat coconut up the sides of the cake next, and be prepared for a coconut explosion in your kitchen. That stuff gets EVERYWHERE during this phase of the process. It would be annoying if the end result weren't so darn delicious.

Pipe a little frosting around the bottom of the cake and voila! An absolutely gorgeous specimen, if I do say so myself.

So pretty that I think we need a close-up. Why hello there, lover. What's that? You want Christie to eat a big, thick slice of you? All right. If you insist.

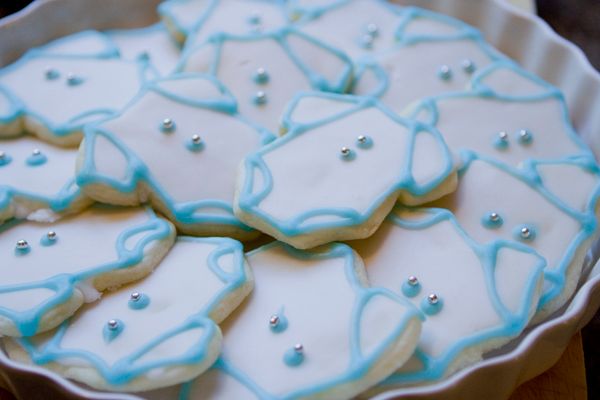
For the baby shower, I also made some of these. Chase came in and asked me why I was making diaper cookies. What say you, internets? Diapers or onesies? I'm sticking with onesies.

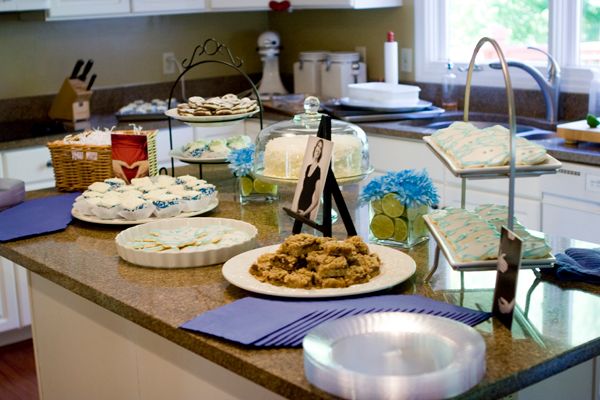
The buffet of gluttony, just waiting to be devoured:

And the gorgeous mom-to-be in a pre-shower photo shoot by yours truly:

It's almost wrong how cute she is pregnant, isn't it? I can't wait until the baby is born so I can get myself some newborn lovin'. Yum.

That's what I've been up to this week. Stay tuned for the long-awaited Traveling Shoes winner, a little visit from my brother Dan, and gorgeous photos of gorgeous people.

I think it's shaping up to be a good week after all.

Channeling my inner June Cleaver


A few weeks ago, I made a bargain with my friend, Maren. I told her that if she would teach me how to make jam, I would teach her how to make homemade chicken noodle soup.

Gabi has posted about the four-generation family recipe for chicken noodle soup here, which I now consider to be a large portion of Hannah's future dowry. I might have married the Husband for this recipe alone, had I known.

It is the same recipe I faithfully use, and it is truly amazing. My favorite part is actually using half an egg shell to measure the milk for the noodles. Something about that just seems so old-fashioned, so earthy.

What? I can be earthy. I can be old fashioned.

Shut up.

ANYway, I urge you to take advantage of the season, head out, and get yourself some strawberries, sugar, pectin, and jars. Because the joy of taking this:


While remembering to do a little bit of this:

And laughing with someone while they do this:


Will ultimately net you a large batch of this:

Pure, red, sugary heaven.

Which, by the way, I have had to ration. The little (and big) people around here seem to think they can have jam on just about everything. It's killing me how fast we're going through this stuff. I feel like I need to stash it safely away from their grubby mitts and growling stomachs.

I decided to hide the rest in the freezer under the vegetables. We all KNOW the children will never look there.

Neither will the Husband.

So, without further rambling on my part, I give you the recipe:

FREEZER JAM
3 cups mashed berries
5 cups sugar (I know, don't even say it, Robyn)
1 cup water
1 box pectin

Wash and stem the berries. Mash by hand (or in a blender if you're lazy like us). Stir sugar into berries and let sit for 20 minutes.

In the meantime, add pectin to water and stir until dissolved. Bring water and pectin to a boil, and boil for one full minute. Add water and pectin to berry mixture; stir until combined. Pour into clean, dry jam jars, leaving a little head room at the top. Cover with lids. Let jam jars sit on your counter for 24 hours, then store in the freezer.

Or until your piggy little munchkins get a hold of some and practically eat it by the spoonfuls.

Also critical to the success of the recipe is having some warm, soft, homemade bread handy. It helps you ensure that your blood sugar will remain in a constant diabetic state for at least a week straight.

Which any good jam really ought to do.

Trying hard to keep the 11th commandment

I believe there was an 11th commandment that somehow got misplaced while those pesky Israelites were off wandering in the wilderness. It reads: Thou shalt always mix peanut butter with chocolate.

Am I right?

You know I'm right.

Today, dear friends, I am feeling generous, and am going to give you one of my all-time favorite recipes.

May it make your bottom as large as it has made mine.

Reese's Peanut Butter Cup Cookies
Cream together:
1 cup butter
1 cup sugar
1 cup brown sugar
1 cup peanut butter (though I rarely measure the p.b. Just grab a big scoopful, then you don't have to dirty up a measuring cup with something sticky)
2 eggs
1/2 tsp salt
1 tsp. vanilla

Mix well, and add:
3 cups flour
1 1/2 tsp. baking soda

Then you must take a smidge of the dough and do this:


Because you never know. It could be poisoned. And if it was, you would then probably look like this (only slightly less out of focus):

More than likely, your dough will not be poisoned (unless you have a lot of enemies and a handy supply of arsenic). And this is what you will look like after a delicious lump of cookie dough has been sent right down to your thighs stomach:

Next, spray your mini-muffin tins with Pam.

Hopefully, you will be looking at your pan and not through the lens of your camera while doing this. The general idea is to actually spray the Pam inside the muffin cups, and not all over the sides of the pan.

Once that is done, roll the dough into one-inch balls and set into the pans like this:

Pop those babies into a 350 degree oven for 8-10 minutes. While they are baking, you can start de-wrappering the Reese's peanut butter cups. I always solicit the help of a little munchkin and her tiny fingers for this job:

But beware, for the munchkin will sometimes sneak a cup or two when she thinks that no one is looking:

Then she will smile innocently, her chipmunk-like cheeks stuffed to the gills with chocolate and peanut butter, and pretend that nobody is the wiser:

Oh, you little munchkin. We're on to you.

Then when your timer dings, pull the pans out of the oven, and press a peanut butter cup into the center of each cookie. Press firmly, until the cup is level with the top of the cookie, like this:


Let the cookies cool in the pan for 8-10 minutes to firm up. Then gently take a knife and plop them out, one-by-glorious-one.


Repeat until all the dough is gone or until you run out of peanut butter cups, whichever comes first. [One batch will usually make a large bag of p.b. cups.]

Then be sure to check the pictures on your camera. For while you were working, the little munchkin will have accidentally taken about 1,893 pictures of your bosoms. Which would be fine, say, if this were a porno cooking blog, now wouldn't it?


But since it's not, you will have to content yourself with the sight of these lovelies instead:

Hello, lover.

[And don't be thinking that these will last in your house for more than an hour. They won't. I absolutely guarantee it.]

Happy baking.

Thanksgiving Teepee Cupcakes, revisited

Remember how I made these last year for the cub scouts? I figured I could try and cute them up a little bit for this year, as well as provide you with clearer instructions.

Aren't you excited?

[On a side note, the Husband has been mocking me all day because I have been touting my creativity for inventing these. He does not believe that I came up with them. It is surprising, yes, as I tend to not be all that creative. But these are my one and only contribution to the universe, such as they are.]

Yay me. And yay for you, universe.

So, let's start at the beginning, shall we?

Mix a cake mix according to the package directions. You will need to get a disposable aluminum baking pan. Turn the pan upside down and poke a few small holes (maybe a half inch wide). Fill your sugar cones two-thirds full of batter and stand them up in the holes in your pan like this:

They tend to topple as the batter rises, so you need to keep an eye on them in the oven. You may have to stick your hand in the hot oven and right the toppled ones. Be very careful when doing this. Hot ovens can burn you.

Stellar instructions, no?

Also, you should put your oven rack on the lowest shelf possible, so as to keep the tops from getting too brown. The bottoms will be very brown, but we will take care of that later on.

Bake at 350 for 10-12 minutes, or until the batter springs back lightly when touched. Remove from the oven and immediately snip off the bottom of the sugar cone (which will now become the top of our teepee). You must do this immediately when the cone is still warm and soft. Otherwise, it will break into pieces.

You can also snip off the cupcake if it's too rounded, ensuring that your teepee will stand flat. The bite you cut off goes in your mouth. Do not skip this step. It's very important. You must not discard those bites. Eat them. Eat them now, dammit.

Then take three pretzel rods and stick them on the top of your teepee. I used bamboo skewers and/or toothpicks last year, but a reader gave me the pretzel rod idea, which I totally like better [thanks, tallkate!]. I also found the whole pretzel to be a little long, so I broke each piece in half before inserting it into top of the teepee.

Your teepees will now look like this:

While they are adorable, they are not quite done. Melt a handful of chocolate chips in the microwave and stir until smooth. Dip the bottom of your teepee in the chocolate like this:

Doing that kind of seals the cupcake in and prevents our friend gravity from pulling it downward. Then roll it in green sprinkles for grass (or autumn leaf sprinkles for leaves), or pink barbie sprinkles, if that's your thing, and so on. I went for the grass and leaves. I'm such a traditionalist, I know:

Take a little of the melted chocolate and pipe around the pretzels to hold them in place (and provide a delicious bit of chocolate pretzel to eat later).

And voila! A happy little Indian village to decorate your table at Thanksgiving.

Any questions?

You're totally welcome, universe.

Spiderweb Cookies revisited

It's that time of year again, interpeeps.

No, not the time of year where we finally pull out that naughty french maid outfit and decide to hooch it up at the PTA party.

It's the time of year where we raid our children's trick-or-treat bags and steal all the good chocolate.

Don't even pretend you don't do it.

But I just made these today, as per our annual tradition. If you want the recipe, see the post I did on it last year. You won't be sorry. They are so, so good.