How-To Tuesday: How to whiten teeth in photoshop
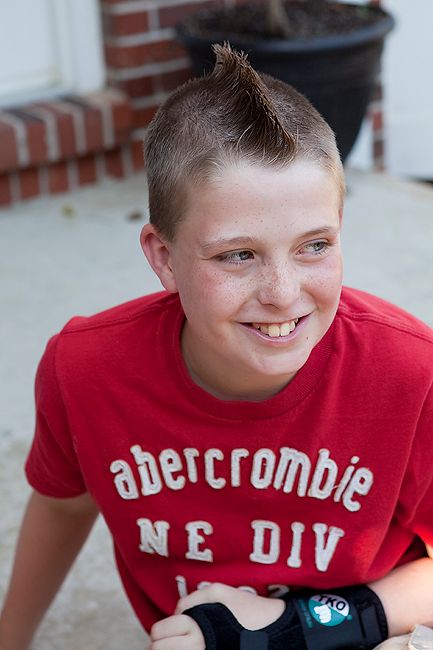
/Let's say you have a photo of your son that you love. Your son and his awesome mohawk from last year. Only, since he is a kid, and not always as diligent as you'd like him to be, his teeth brushing has left something to be desired. Rather than live with the
There about 9,459 ways in Photoshop to whiten teeth. I make no claim that this is THE one and only way. It's just the way I do it. And it takes less than a minute.
Step one: Open your image in Photoshop. I use CS3, but I believe it would work in Elements, as well as the newer versions.
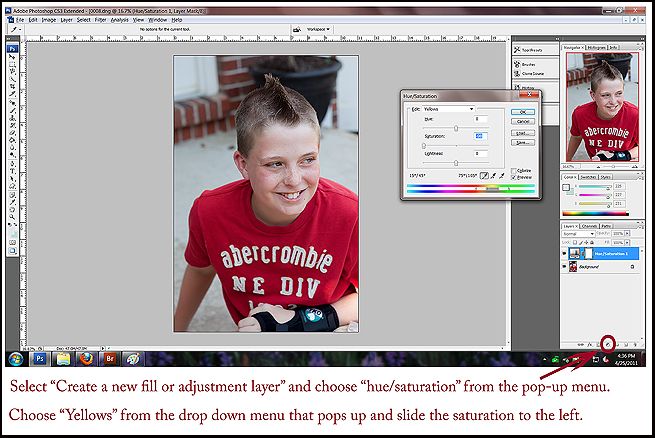
Select the yin/yang looking icon on the bottom right hand side to create a new adjustment layer. In the pop-up menu, select "Hue/Saturation."
When the Hue/Saturation dialogue box pops up, select "Yellow" from the pop-down menu, and turn the slider for saturation to the left until your teeth have no yellow in them. At this point, you will likely have ruined the rest of the photo, but take heart, we will fix it later. Just focus on the teeth. Click OK.
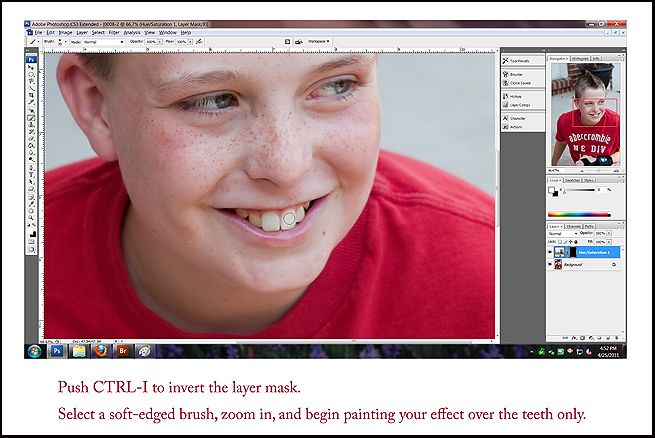
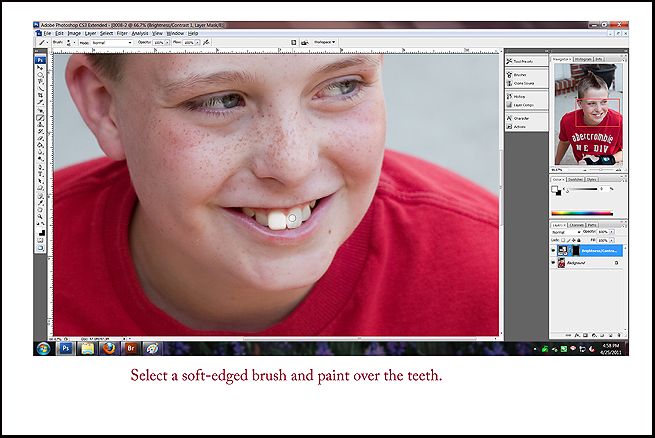
Zoom in until your screen is filled mostly with the teeth. Now you want to hit CTRL-I, which will invert the layer mask. We will then use our brush tool (just push letter B and it will shortcut to the brush). Choose a soft-edged brush and begin "painting" over the teeth. This paints our saturation adjustment layer back in - restoring the fix we did, but only in the areas we want (i.e., the teeth). If all looks okay to you, merge down your layers.
Still with me?
Good. You can do this. While the teeth look considerably less yellow, they lack any whiteness or brightness to them. We want to fix that.
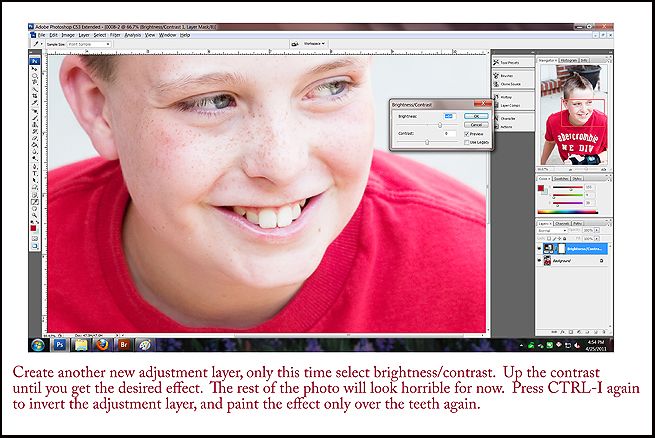
Create another adjustment layer, this time click on "Brightness/Contrast" from the pop-up menu. In the dialogue box, you want to take your brightness slider and move it to the right. Don't panic when your whole image starts to look wrong. It's all about the teeth right now. We'll fix the rest later.
Once your teeth look nice and bright, select okay.
Then hit CTRL-I again to invert the layer. Select your brush tool (B) and paint over the teeth again.
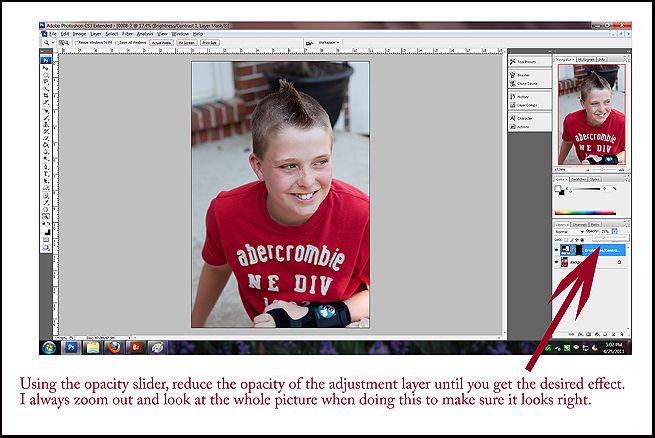
They will likely look horribly white - too white. Zoom out until you are looking at the whole picture. Then take your opacity slider on the brightness/contrast adjustment layer and reduce it until it looks right to you. For me, that number is usually around 25-35 percent. Do what looks best on your photo. Neon white teeth? Not so good. But we want to pop the brightness just a bit. Then merge the layers down.
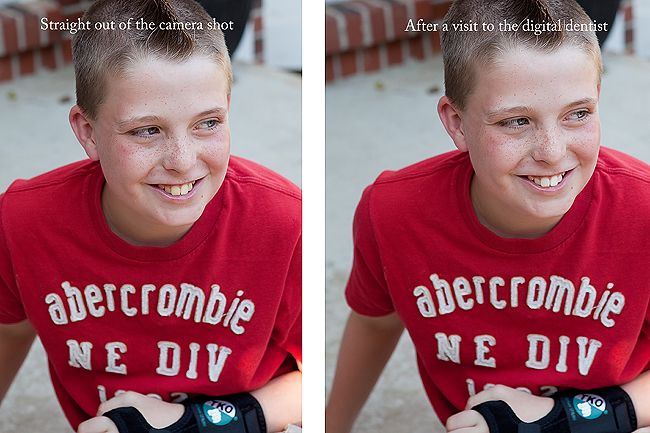
And that's it! It sounds way more complicated than it actually is. And here is our SOOC (straight out of the camera) shot and the edited version. The difference is subtle, but that means we didn't overdo it in editing. A nice, white smile that doesn't look like we photoshopped the crap out of it.
Always a good thing.
Your turn. What can you teach me today?
Mister Linky's Magical Widgets -- Easy-Linky widget will appear right here!
This preview will disappear when the widget is displayed on your site.
For best results, use HTML mode to edit this section of the post.
This preview will disappear when the widget is displayed on your site.
For best results, use HTML mode to edit this section of the post.


