How-To Tuesday: Coconut Cake Balls


Our town has a cupcake store that is dangerously close to my front door. Their cupcakes are good, but definitely not my drug of choice. (Unless it's their red velvet. Then I can eat my weight in them.)

There is one item in their store, however, that I would buy each and every single day of my life except for two things:

1. They are almost two dollars a PIECE (and they're so small that I really need about 8 to satisfy my thirst for them)
2. I would weigh 900 pounds in less than a year

So I took it upon myself this week to try and recreate their tasty bites of awesomeness, if only to save the Husband's wallet a few dollars. (And to save me the shame of showing up there to buy any more. Last time? I placed my order for a dozen, and the clerk said, "Oh, you're the cake ball lady!" Yikes.)

While they do not taste exactly like the store's, they still taste absolutely divine. I will totally be making them again. And possibly again.

I give you, dear internet, the coconut cake balls:

Photobucket

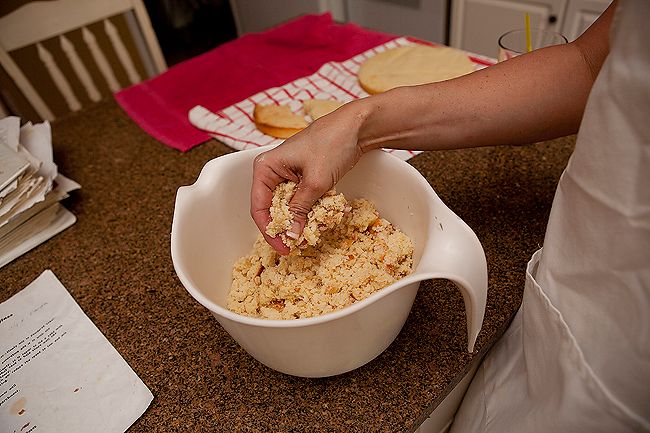
First step is whipping up a batch of my version of the coconut cake (adapted originally from the goddess that is Paula Deen). Bake according to my directions and cool. Crumble cooled cake into a bowl and squish until you have fine crumbs. (Note, this cake makes three layers and is A LOT of cake balls. I only crumbled up about 1 1/2 layers and got around 50 balls, FYI.)

Photobucket

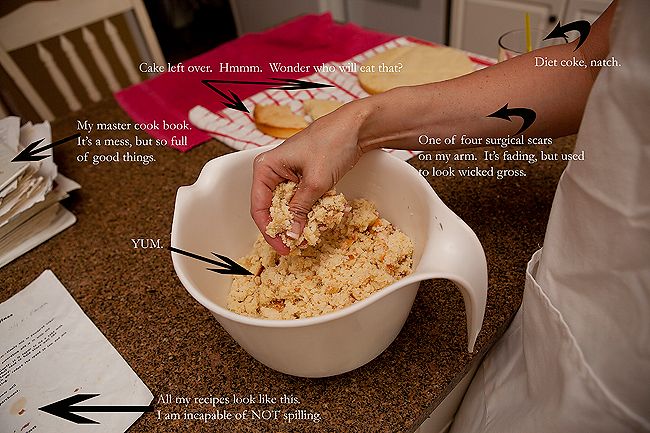
Some interesting observations here about me, my workspace, and the way I operate.

Photobucket

Moving on.

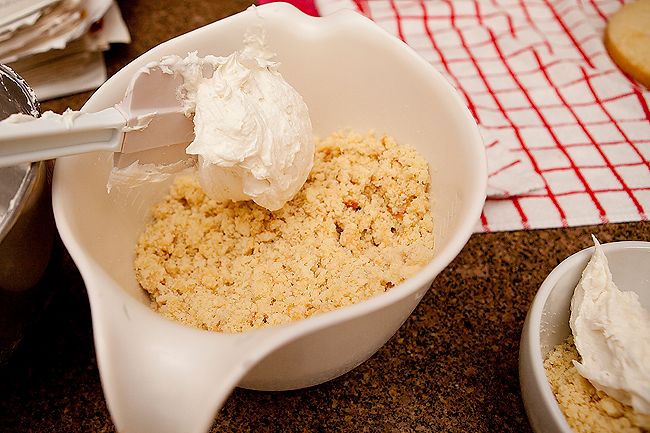
Add a cup or two of your favorite buttercream frosting. This one is my personal favorite and the only one I let touch my perfect cake. My darling. My preciousss....

Photobucket

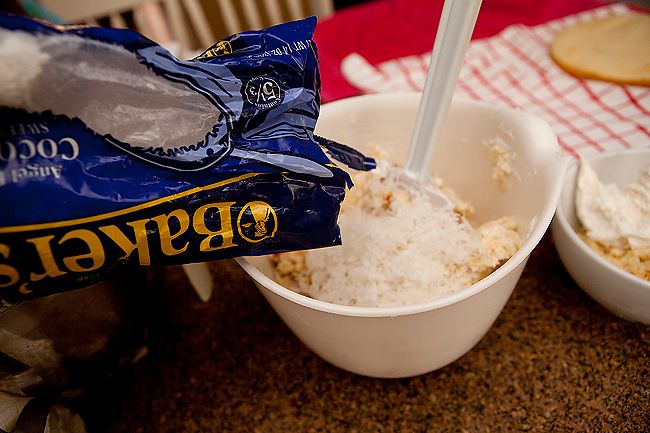
Mix the cake and frosting with your hands until combined, adding more frosting to taste. Then pour in some coconut. I added roughly 1 1/2 cups.

Photobucket

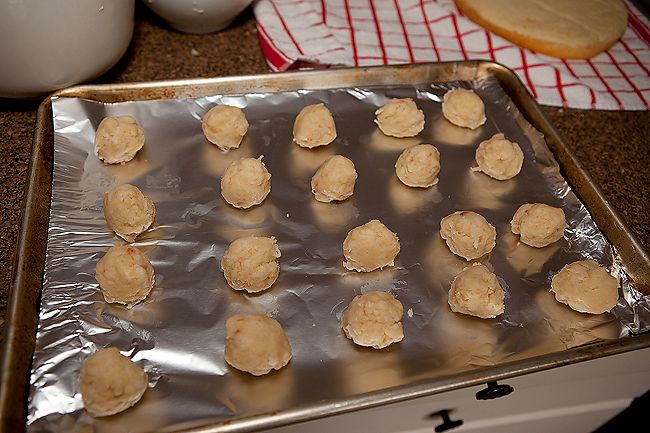
Then roll them into balls and pop in the freezer for about 15 to 20 minutes.

Photobucket

Then (are you tired of using your mixer yet?) mix up a batch of my sugar cookie glaze:

2 3/4 cup powdered sugar
2 tsp. shortening
3 Tbsp. water
1 Tbsp. corn syrup
1/4 tsp. vanilla

I wanted it pretty thin, so I ended up adding easily 9 Tbsp of water or more. Just keep adding water until it's the consistency of Elmer's glue.

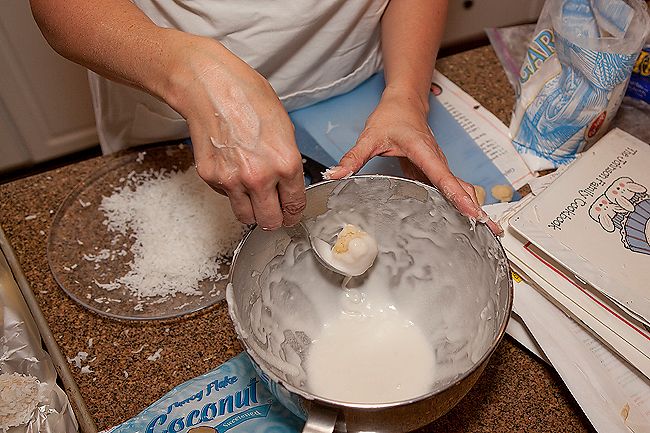
I dipped the balls into the glaze and basically rolled them on the edge of the bowl to get most of the glaze off. Otherwise, it's just too much. You only want a light coat.

Photobucket

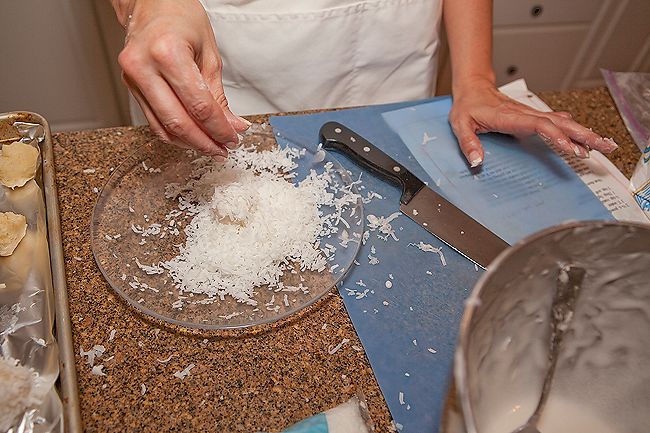
Then dip, roll, and cover these babies in coconut. Be prepared for the coconut explosion in your house. It gets E-V-E-R-Y-W-H-E-R-E.

Photobucket

Garnish as desired and try not to eat too many of them. I popped them into mini-cupcake papers (though I was wishing I had a color other than white so as to make them stand out more), but I'm pretty sure no one is going to complain about that.

Except the angry voice in my head.

And nobody listens to her.

Photobucket

And that, my friends, is how you win friends and influence people. Amen.

Your turn!

Mister Linky's Magical Widgets -- Easy-Linky widget will appear right here!
This preview will disappear when the widget is displayed on your site.
For best results, use HTML mode to edit this section of the post.

How-To Tuesday: Canvas Maps


How-To Tuesday is back, baby!

And today's post comes to you courtesy of Creative Juices Decor. I saw this idea featured on Remodelaholic and knew it was exactly what I had been looking for. We have been wanting to put a map up in the basement and keep tabs on the Husband's travels, as well as our own, for quite some time now. In fact, we've had the map waiting for almost a year, with just no ideas of how to hang it. When I saw this post, it was perfect.

(Note: If you do decide to post your own tutorial, please link back to Creative Juices. This idea is all hers and she should get the credit for it. I am nothing, if not vigilant, when it comes to crediting others for their brilliant ideas. Please do the same.)

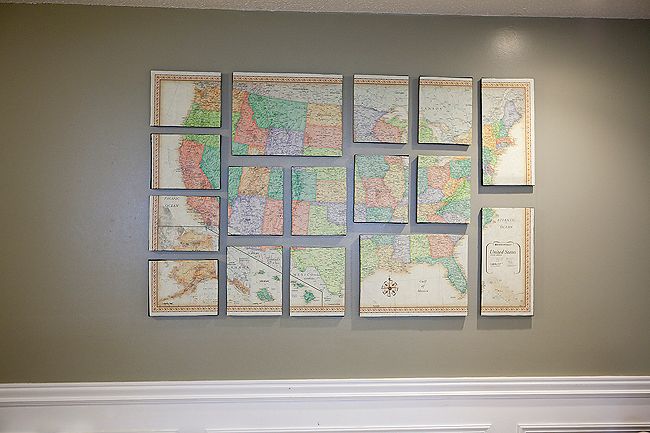
All right. Here we go. Our multi-canvased map:

Photobucket

I started by tasking the Husband with designing the layout. He created the masterpiece in our living room, and I knew this would be perfect for his spatial brain. My brain? Pretty much full of a combination of People Magazine, puppies, and diet coke. Not much room in there for the math. Lucky for me, he is really good at the math.

We measured our map, then bought the canvases to fit per his design. I spray painted the edges black, not worrying about the fronts at all (since they will be covered by the map).

Photobucket

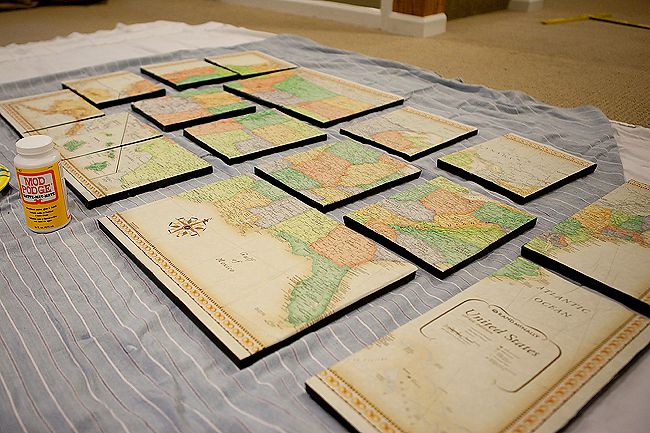
Once dry, I brought the canvases inside and laid the map over the top. I measured each canvas, and cut the map to fit each piece.

Photobucket

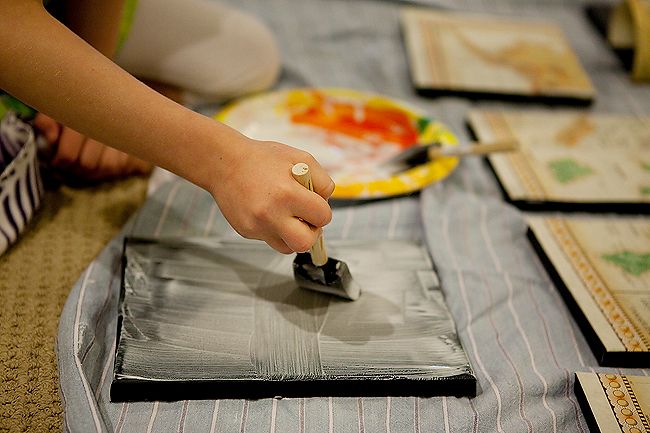
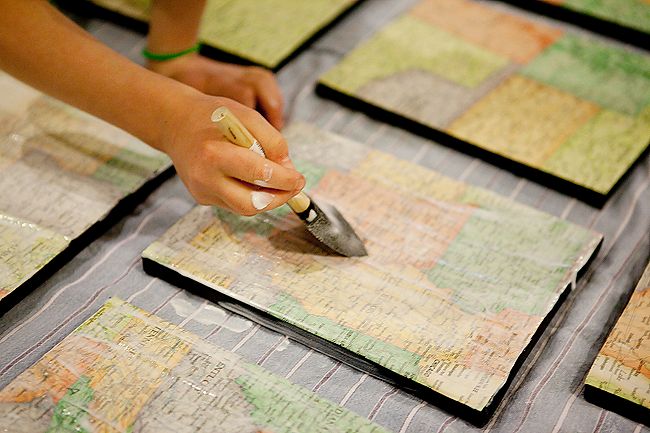
I then started to adhere the map pieces to the canvas with Mod Podge, and found a very eager little girl by my side. I silenced my inner Martha and let her help. After all, we were going to be sticking pins all over these maps. What damage could a child helper do?

She actually did great. She's much more craftily talented than her mother.

Photobucket

After the pieces were all attached with the Mod Podge, we left them to dry.

Photobucket

Once dried, we came back and applied another layer of Mod Podge. Then let it dry. And applied another.

Photobucket

[Not pictured: Since I knew we were going to be putting pins in these, I also cut a square of foam board and stuck it in the back of each canvas. I wanted the pins to have something to stick to, and this worked great. I simply hot glued the foam board in.]

Then the unhappy task fell to the Husband of getting the many pieces hung. This required a lot more of the math, plus a level, tape measure, and nails. He's slightly obsessed with never having any extra nail holes in the wall when he hangs things, and that makes it much more difficult (though efficient). It was a pain.

He's a good man. I'm totally keeping him.

Photobucket

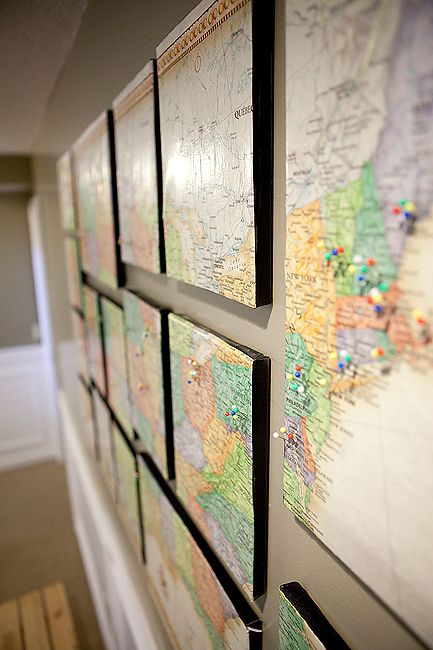
Once hung, we started to put in pins for all the places we've been. Everyone got their own colored pin. The Husband's is red -- suffice to say, there are A LOT of red pins. The kids had fun helping and reliving vacation destinations. By the way, we only count a city/state if we've spent the night or had a purposeful meal there. Airports and drive-thru's do not count. Even still, we have been to a good number of states between the five of us.

Photobucket

And that's it! Super easy, visually interesting, and a fun way to keep tabs on our family travels.

Your turn. What can you teach me today?

Mister Linky's Magical Widgets -- Easy-Linky widget will appear right here!
This preview will disappear when the widget is displayed on your site.
For best results, use HTML mode to edit this section of the post.

Putting it off for a week

Do you hear that, internet?

It is the glorious sound of silence. It is the quiet solitude that comes from not having dozens of unanswered emails in my inbox, yelling at me for replies.

I know.

You thought that the voices in my head were merely the product of psychotic delusions. Like the one I have where the phone rings and it is Hugh Jackman on the line. (Hi, Hugh! Call me!)

No, the silent voices you don't hear right now are the peace that comes -- for once -- from having all my loose ends tied up.

At least electronically.

Sure, I have four photo sessions to edit. And dust collecting on the shelves in my bedroom. And a car whose registration expires very soon. And kids' closets just begging to be purged. And books waiting unread on the nightstand.

Crap. Now I feel stressed and panicked again. I HAVE SO MUCH WORK TO DO! Thanks a lot, me. WhatEVER.

But for the first time in months, my email inbox is neat and tidy. So neat, in fact, that there are only TWO emails sitting there. TWO! (Both online shopping confirmations that will be deleted as soon as the products show up. Yay!) I feel as though I have accomplished a huge feat.

But tragically, since I chose to tackle that task tonight, it leaves me without any time whatsoever to do a How-To Tuesday post.

I know. Somewhere in the world, a lone soul just cried into his cheerios with sorrow and defeat. (Poor Dan. Whatever will he do to console himself?)

But if by some small miracle, you were powered up and ready to participate - keep that post in your drafts folder and we'll get to it next week, I promise. If, like me, you felt as though you were treading water for the past five days, consider this your lucky day and take a breather.

Yeah. You're welcome.

How-To Tuesday: How to Survive Spring Break


Today's How-To Tuesday comes to you courtesy of a genius idea the Husband had this weekend while we were on our little stay-cation. (No, it is not his How To Ignore Your Children While They Are Vomiting In The Night Idea. It's one I actually liked.)

As I mentioned yesterday, it is spring break around here. Which is really just school jargon for a week where the kids whine because they're bored, fight because they're annoyed, and end up costing me a small fortune in entertainment (which, nine times out of ten, they are bored by, fight at, and in general, annoy me as a result of).

The Husband's brilliant idea was this: We estimated the amount of money we would likely be spending for entertainment during spring break. Between movies, eating out, various museums/bowling/skating/jumping and whatever else they conned me into doing, there is always a big chunk of change. We took this amount and presented it to the kids in a large pile of cash. We told them the rules were this:

1. Whatever we did this week is going to be completely up to them (and they all have to agree amongst themselves about the activities). They can spend the money however they want on whatever activities they feel like.

2. Whatever money is left over, they can keep and split three ways.

3. Since THEY are choosing the activities, there will be no whining/fighting/teasing allowed. If any such behavior ensues, money will be subtracted from the pot. This rule automatically forfeits their right to complain about pretty much anything this week. I think it's my new favorite rule ever.

4. If they choose to pocket the money and forgo fun activities/eating out - they are responsible for finding their own entertainment for the week. If anyone were to come to me stating their boredom or unhappiness with the situation, money would again be withdrawn from the pot. It removes the burden of playing cruise director from me, and puts the responsibility of that right in their own little hands.

How did they take to the proposal?

FAN-FREAKING-TASTIC, I tell you.

First, they spent an hour and a half in a meeting of the minds, discussing, prioritizing, and debating happily -- all without my involvement.

Second, once they had lists of everything they wanted to do during the week, we started pricing it all out. Yes, the zoo is free. But parking is ten dollars. And the like.

Having all the information changed their initial budgeting quite drastically. I could hear them deciding whether or not it was worth it to go out to eat. I heard them lament at the exorbitant cost of restaurant eating. I mean, drinks are like three whole dollars!?

It was music to my mama ears.

We will see how it plays out, but so far today it's been amazing, and our plans for the week look better than anything I could have come up with. Plus, it provides a little lesson in budgeting for them with tangible, actual dollars. It gives them the freedom of choice, and the responsibility for their own happiness. I think the Husband may have stumbled upon his most genius idea yet.

Your turn. What can you teach me to do today?


Money image via.

Mister Linky's Magical Widgets -- Easy-Linky widget will appear right here!
This preview will disappear when the widget is displayed on your site.
For best results, use HTML mode to edit this section of the post.
How-To Tuesday: How to Make Chicken Noodle Soup


Alternate title: How to make your husband go absolutely weak in the knees.

Photobucket

What's that? Your husband's love language isn't homemade chicken noodle soup?

Well.

Make this, and it will be. I guarantee it. That sofa you've had your eye on? A girlfriend's trip to Paris? Make this soup for him, then casually drop into the conversation what you're wanting, and he will be powerless to resist you.

[Not that I'd know anything about that, ahem.]

This is an ancient family recipe, going back generations. It was a staple in the Husband's childhood home, and has become one in ours. It could not be any easier, and I feel it a sin if you waste your life on soup any less worthy.

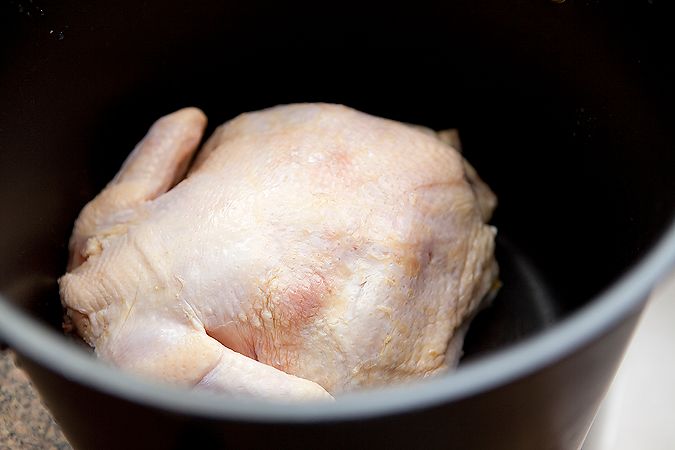
Step one: Take a whole chicken and throw it in a large stock pot. We love to make this with leftover turkey at Thanksgiving the best. Second in line would be the pre-cooked chickens they sell at Sam's Club. But even just a regular, boring, everyday whole chicken will cook up nicely.

Photobucket

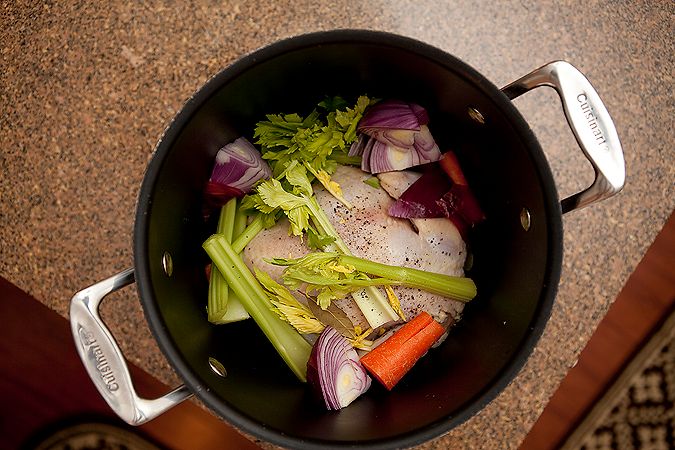
Add: A few whole carrots (unpeeled), a large onion (quartered, and with the skin left on), a few celery stocks (leaves still attached), a bay leaf, and some salt and pepper. I used a red onion here because it's what I had, but red, yellow, or white - any of them will work.

Photobucket

Pour in enough water to cover the chicken by a good inch or two. Then plop it on the stove and bring to a boil, lowering the heat and letting it simmer for a few hours at a soft boil.

Photobucket

During this part of the process, your house will smell divine. Your children will salivate. Text messaged photos sent to your husband's phone will result in meetings being canceled and him walking through the door MUCH earlier than normal. I'm telling you, this soup is like a magnet that pulls your loved ones home.

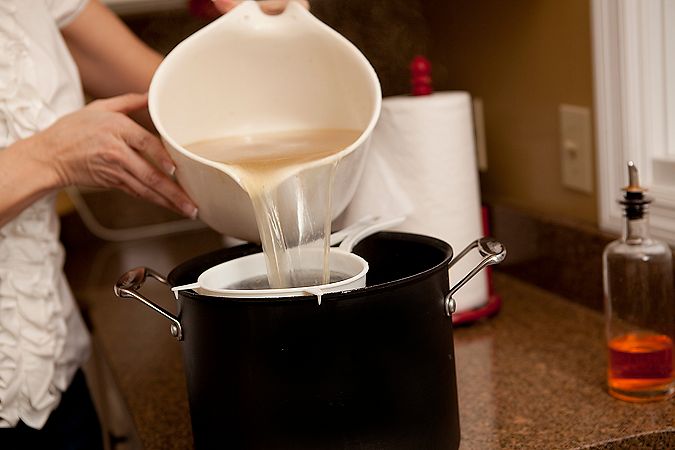
Once it's simmered, boiled, and married all the lovely flavors together, pour everything through a colander to a large bowl. Notice the splash and spillage of broth out the sides? Tragic is what that is.

Photobucket

(It's also wise to do this step in the sink. Unless you like the feel of hot boiling lava on your bare feet.)

I like to then re-strain my broth through a very fine colander or cheese cloth to remove any remnant chicken bits. Your broth will have a lovely yellow color and smell positively delicious. At this point, you could freeze your broth and save it for another day or even another cooking purpose. But since our hearts beat to the drum of chicken noodle soup, that is where we'll be headed.

Photobucket

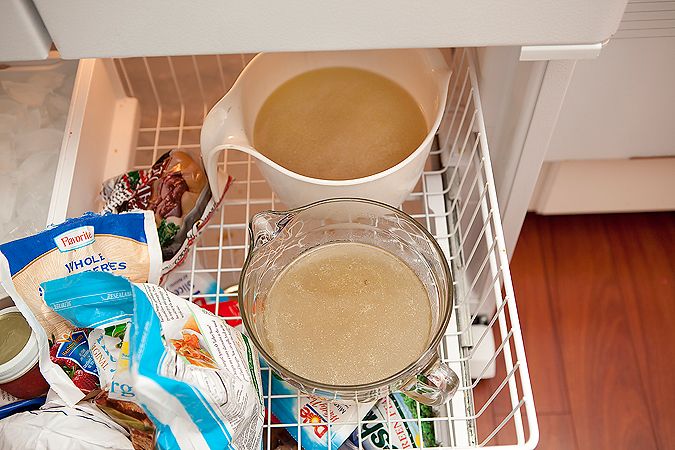
If I can, I make the broth a day ahead and refrigerate it, bringing all that lovely fat to the surface. It makes it so easy to scrape it up and out - keeping your inner thighs free for other fatty treats. But with this batch I was in a hurry, and we wanted to eat right away, so I poured the broth into two containers and froze them both.

Photobucket

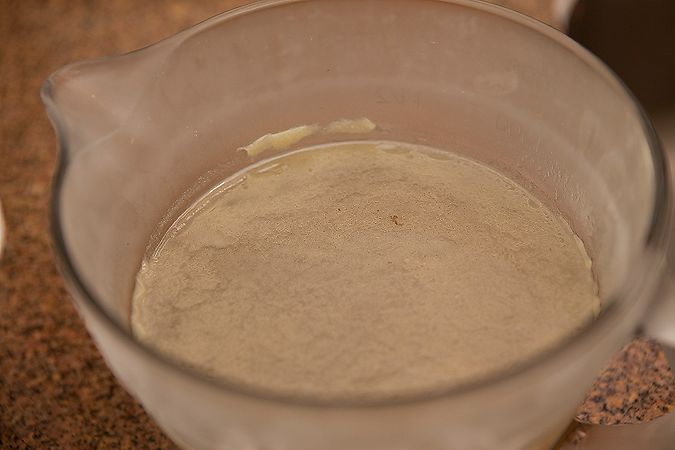
Splitting it like this made it so that the broth could cool/freeze faster, resulting in a lovely layer of fat just waiting to be removed.

Photobucket

Pour the now-fatless broth back into your stock pot and put it over medium heat on the stove. By this time, your chicken should be cooled enough to remove all the meat from the carcass. Probably the worst job in this whole process, but a necessary one. Discard the bones and vegetables once all the meat is removed.

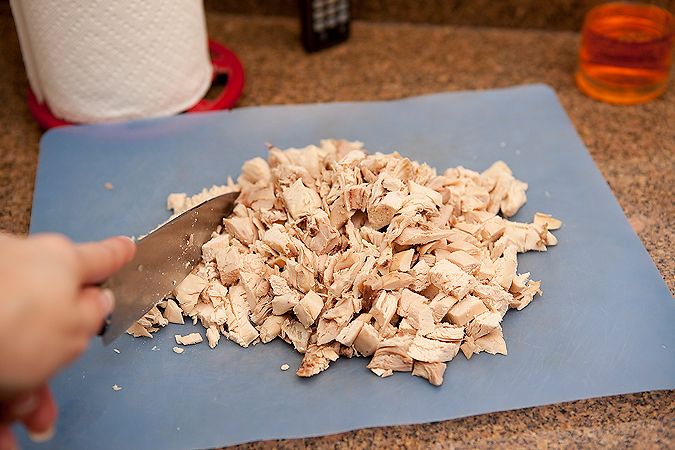
Chop your chicken finely. Add it to your broth on the stove.

Photobucket

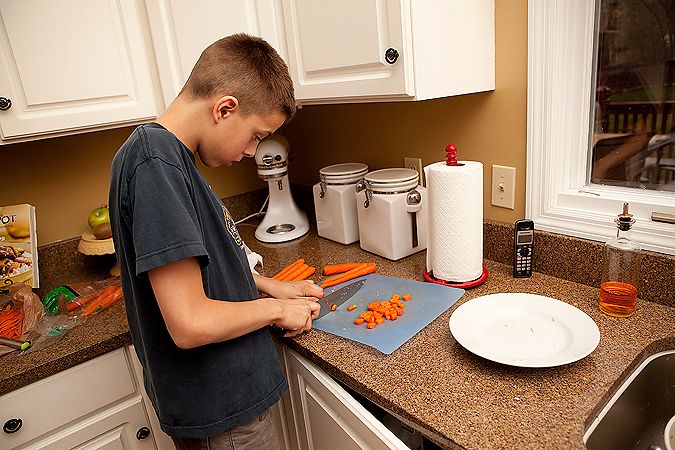
Recruit a minion or two with the promise of knife usage and you will find help abundant in the kitchen. Have the minion peel and chop 5-6 carrots. Or ten if you like. Whatever suits your fancy. Then add them to the pot.

Photobucket

Next comes the step that MUST NOT be skipped. Don't be tempted to throw a few handfuls of rice or (heaven help you) store-bought noodles. The whole point of this soup is the homemade noodles.

Take:
1 cup flour
1/2 tsp. salt
1 egg. beaten
1/2 egg shell full of milk or cream

Mix all ingredients together, adding more flour or milk to make a pliable dough. Also? We typically double or triple this for a big batch of soup.

What can I say? Girlfriend likes herself some noodles. So do her peeps.

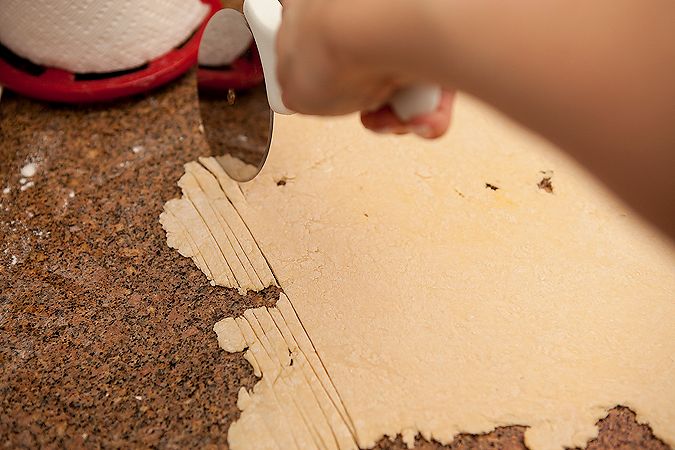
With a rolling pin, roll the dough flat and slice it into strips with a knife or pizza cutter. Don't be worried about getting them all even and perfect. Homemade noodles should be of every height, width, size, and breadth.

Just like people.

Photobucket

When your broth is at a medium boil, drop your noodles in, one at a time. Simmer for 15-20 minutes.

Photobucket

Then, ladle up a big bowl. If you are really awesome, serve some warm bread and butter on the side. Then sit back and watch your husband's face carefully. With the first bite, and its earthy, homemade goodness, you will see precisely just how much he loves you. He will be unable to hide it. You will be delighted.

Photobucket

Now it's your turn. What can you teach us today? Leave the link to your own how-to post in our Mr. Linky below. Then be sure to copy the html code (under the blue button on my sidebar) into your post. Sit back, and wait for the internet to bow at the throne that is your genius.

I'm waiting. Anyone?

Oh well. Next time.

Mister Linky's Magical Widgets -- Easy-Linky widget will appear right here!
This preview will disappear when the widget is displayed on your site.
For best results, use HTML mode to edit this section of the post.
How-To Tuesday: How to tailor a shirt


Welcome to the very first installment of what I hope will be a long series of highly informative, entertaining, or just plain silly posts on our How-To Tuesdays.

[I know it's Monday. I wanted to get it up early to give you all a chance to link up. And make sure I did Mr. Linky right.]

Today I am going to share with you a little secret that tailors everywhere do not want you to know: How to tailor your own shirt.

You see, last year, the Husband decided one morning that he wanted to get in shape. All he pretty much had to do was decide that and 20 pounds fell off his body.

I tried really hard not to hate him for it.

Being the frugal man that he is, he did not want to run out and buy all new shirts. We figured we could tailor the ones he wanted to keep, and buy some new ones, as well. So we researched how to do it, purchased a sewing machine, and made the greatest discovery ever. This is so easy, it's ridiculous.

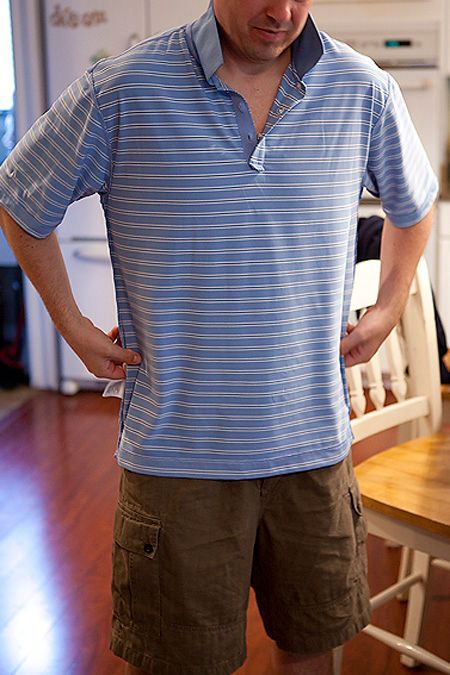
Start with the shirt you want to take in. Put it on inside-out.

Photobucket

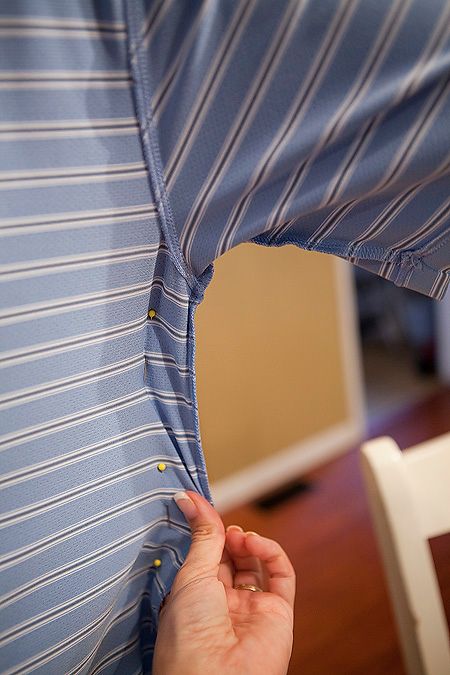
Pull the fabric to your desired fit, and start pinning. You need to pin both seams on the sides - going all the way up the length of the shirt.

Photobucket

In order to avoid any bunching, you need to make a continuous seam from the sides to the sleeves. If you are not taking in the sleeves at all, just sew up around the armpit and taper off until you meet the existing arm seam. If you are taking your sleeves in, keep pinning to the end of the sleeve.

Photobucket

Carefully remove the inside-out/newly pinned shirt from your model, being careful to not scratch his face with the pins.

Because when you do that? He doesn't like it. At all. And WILL complain loudly.

[Cough*wuss*cough.]

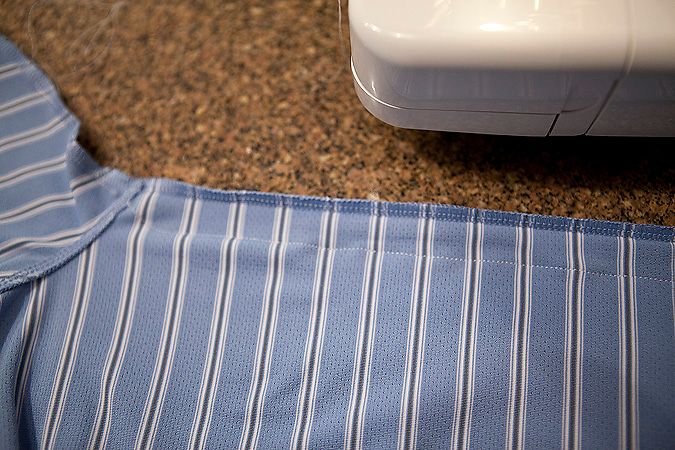
Then sew a straight line from the bottom of the shirt up to the sleeves, again, tapering off as necessary. Because he didn't want to take the sleeves in (you know, to accomodate those large, manly biceps), I simply tapered my seam until it met the existing arm seam.

Photobucket

Before cutting off the excess fabric, try the shirt on (right side out this time) to make sure it is a good fit. If you need to take it in a little more, you can. If you took it in too much, you can unpick the seams and start again.

Photobucket

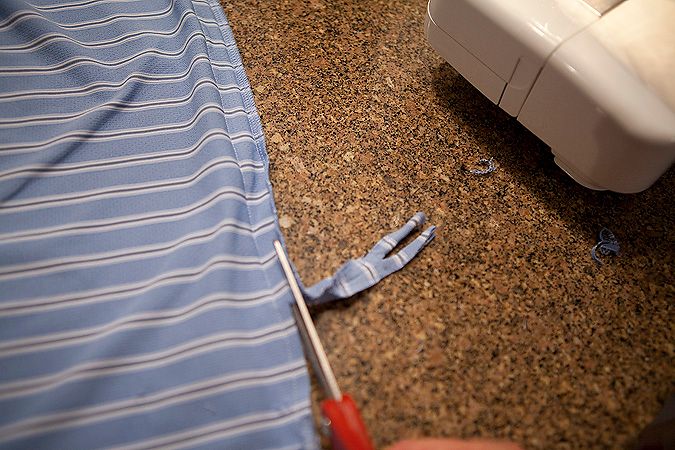
Then carefully, OH SO CAREFULLY, cut off your excess fabric.

Be sure your shirt is not bunched up underneath, or you will cut a large hole in the shirt. And it might happen to be the expensive dress shirt that was your husband's favorite. The one he loved more than all the other shirts. And there will be no repairing it. And you will feel terribly guilty. And he will feel terribly sad.

Not that I'd know anything about that, ahem.

JUST. BE. CAREFUL.

Photobucket

And that's it! Takes less than 10 minutes to do, and saves you oodles of money at the tailor. Which then leaves more money for shoes. Yay!

It works great for women's shirts, too.

Especially if you happen to be smaller-waisted and larger-chested like me. In order to find shirts to fit me in the chest, they are often baggy and big at the waist. Drives me insane.

Enter the self-tailoring.

I bought this tank top at Ann Taylor Loft and fell in love with the ruffly flowers and beading. See? Look how adorable:

Photobucket

Only problem was, all they had left on the rack was a size L, which was too big for me. Rather than walking away from the store in despair, I bought it, knowing how easy it would be to tailor the shirt myself.

Here is the before:

Photobucket

Notice how baggy the fabric is at the waist (and chest). Not a good fit. Made me look larger than I actually am - something I avoid like the plague.
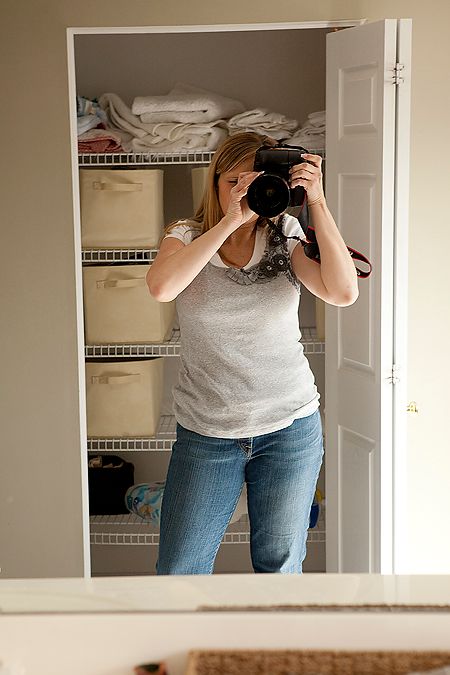
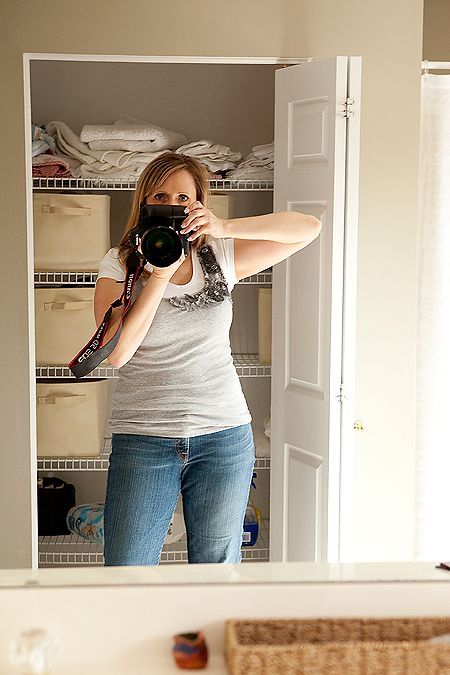
And here is the after:

Photobucket

So much better, right?

I do this now to any shirt that doesn't fit well. If I find something I love on the rack in a store, that maybe is too big in some spots, I buy it anyway, take it home, and fix it right up. Works like a charm.

Now it's your turn. What can you teach me how to do? Type the link to your post in our Mr. Linky here, grab a button from my sidebar, and play along. We all have something we can do. Let's share it.