How-To Tuesday: How to make homemade pitas


Today's How-To post comes to you in one of my all-time favorite forms: The Carbohydrate.

Making your own pitas are so simple, you will never buy the cardboard tasting ones at the store ever again. Seriously. Stop buying that crap. They're gross and full of all kinds of preservatives. Spend a half hour or so making these and thank me later.

[I accept all forms of thanks, including, but not limited to: diet coke, cookies, and/or cash.]

Photobucket

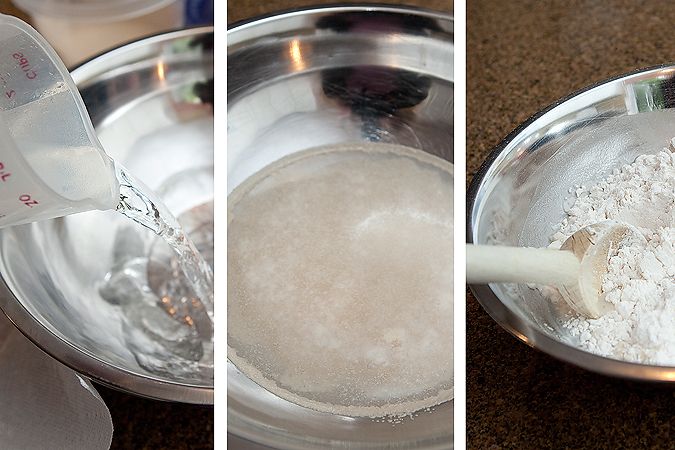
Here's what you do: Take 1 1/4 cup warm water and add 2 1/2 tsp. yeast. Let it sit for about 10 minutes until the yeast is bubbled up.

Then add: 3 cups flour, 1/2 tsp. salt, 1 tsp. sugar, and 1 Tbsp. oil. Mix well.

Photobucket

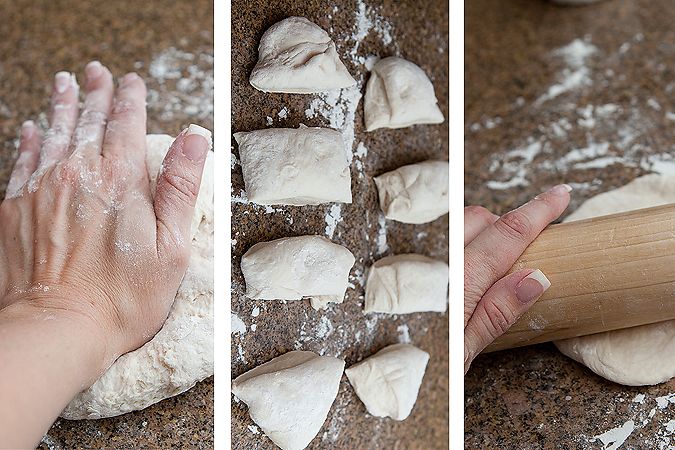
Turn the dough onto the counter and knead well, adding flour as necessary. Divide the dough into eight equal parts. Roll each part into a ball, then flatten into a six-inch circle with your rolling pin.

Photobucket

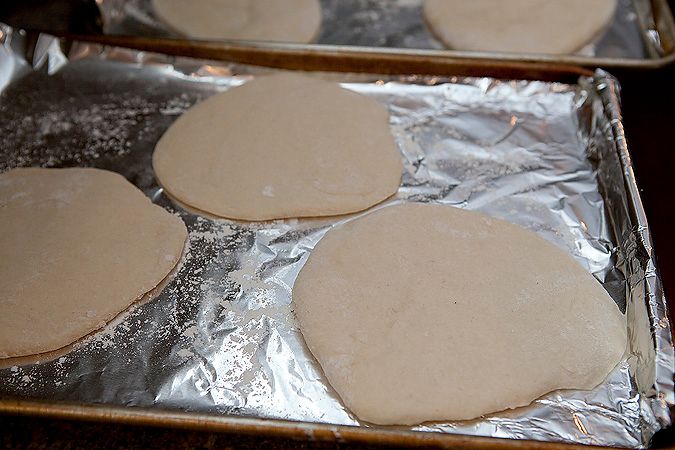
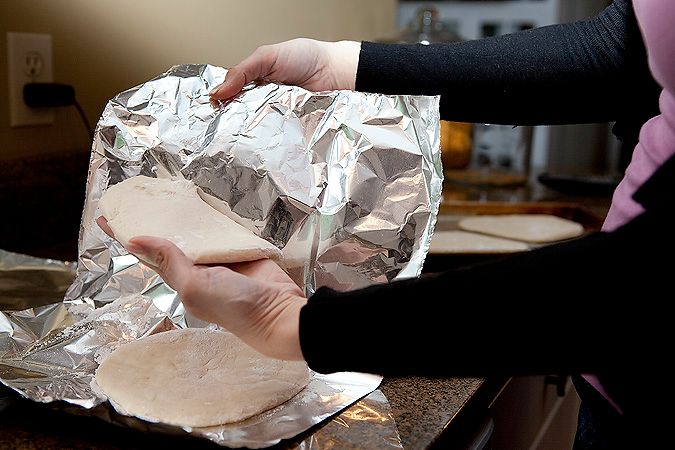
Put circles on heavily-floured foil or parchment paper. Let rest for 30-45 minutes, until dough starts to slightly rise.

Photobucket

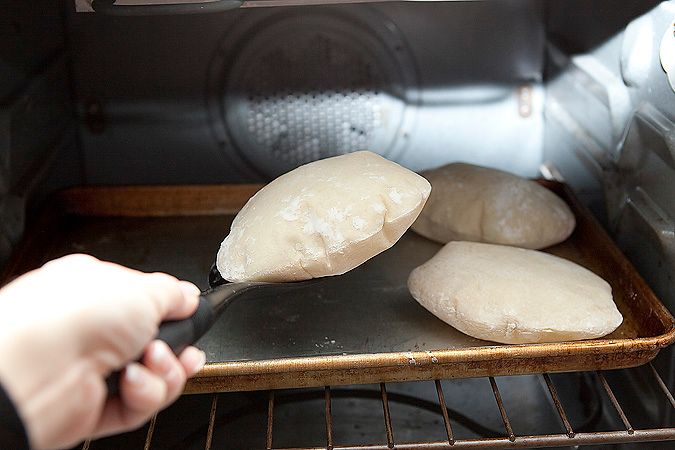
Then gently peel off each pita and place onto an ungreased baking sheet. You need to do this step; otherwise, they will stick to your pan as they rise in the oven.

Photobucket

Bake in a pre-heated 500 degree oven for about 3 minutes per side, turning halfway through. The pitas will puff up while baking. This gives you the hollow center for filling with deliciousness later.

Photobucket

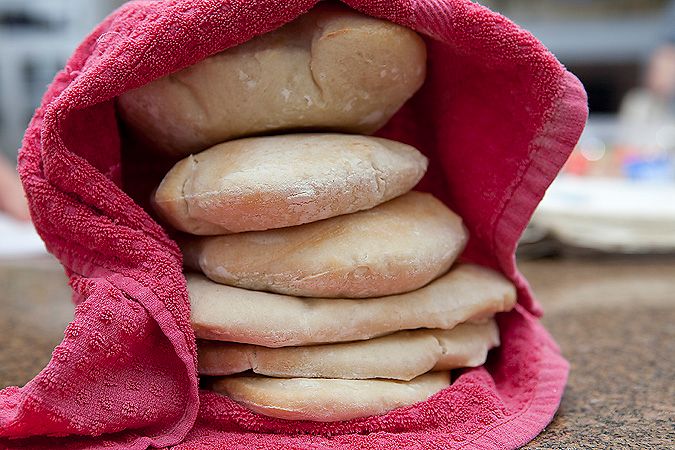
Remove from the oven and stack pitas on top of each other, gently covering them with a towel. Let the pitas rest, and as the steam gradually escapes, each pita flattens out.

Photobucket

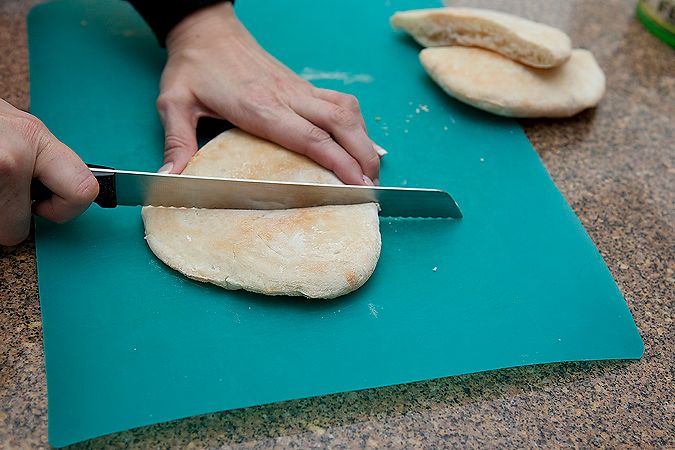
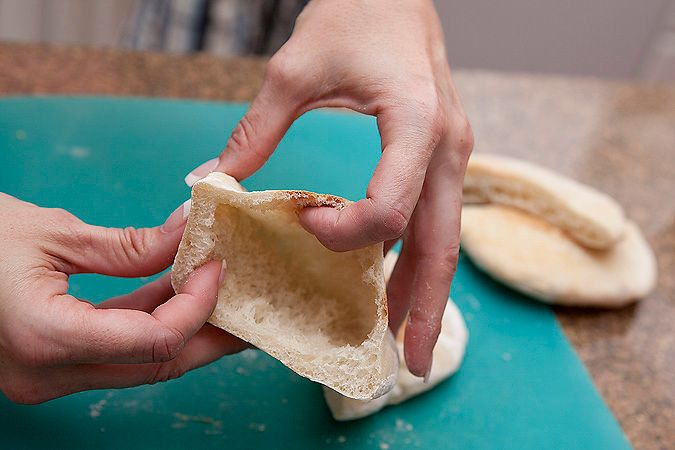
Slice in half with a serrated knife.

Photobucket

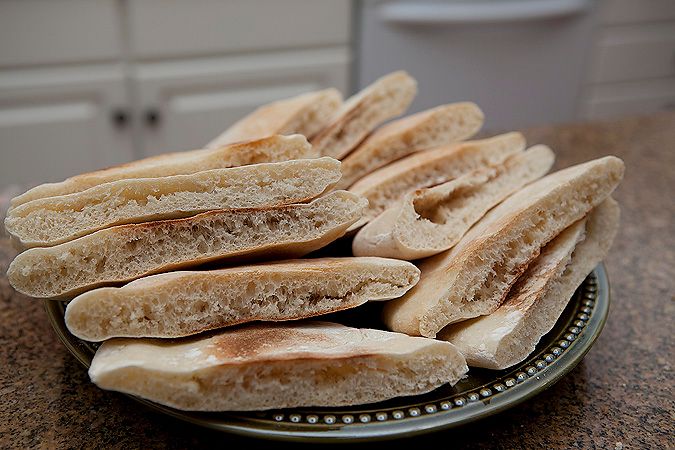
And, voila! A lovely little pocket just waiting to be filled with good things.

Photobucket

These are fantastic right out of the oven, can be made hours ahead, and even freeze well. Look at all the lovelies just waiting to be consumed:

Photobucket

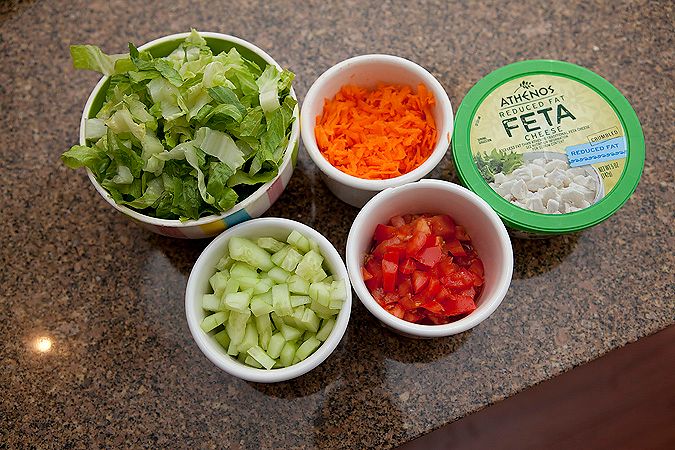
Here are some of our fillings of choice.

[Not pictured: some chicken breast that I sauteed in a little bit of Italian dressing. Drizzle a little dressing onto your filled pita and you have a feast. (Though I am thinking Linsey's homemade hummus would be delish with these bad boys. Note to self: Get to the store ahead of time).]

Photobucket

And for a more printable version:

Pita pockets
1 pkg. yeast
1 1/4 cup warm water
3 cup flour
1/2 tsp salt
1 tsp. sugar
1 Tbsp. oil

Sprinkle yeast over water in large bowl. Let sit for 10 minutes or until yeast is bubbly. Add flour, sugar, salt, and oil. Mix well. Knead dough until soft; divide into 8 equal parts. Roll each part into a ball and flatten into a six-inch circle with a rolling pin. Let rest on floured tin foil for 30-45 minutes or until slightly puffy. Peel off foil and put onto ungreased cookie sheets. Bake at 500 for 4-8 min. flipping halfway through. Stack on top of each other and cover loosely with dish towel to let steam escape. Slice in half and enjoy with your favorite salad or toppings.


And that's it. Your turn.

Teach me. Teach me now, dammit.

Mister Linky's Magical Widgets -- Easy-Linky widget will appear right here!
This preview will disappear when the widget is displayed on your site.
For best results, use HTML mode to edit this section of the post.

On princesses and fairy tale endings

I must interrupt the highbrow, intelligent, and sage wisdom that you usually find here to bring you my thoughts on the royal wedding.

I know. Somewhere in the world my brother Daniel just poked his eyeballs out.

But to understand my feelings on the subject, you must first know something:

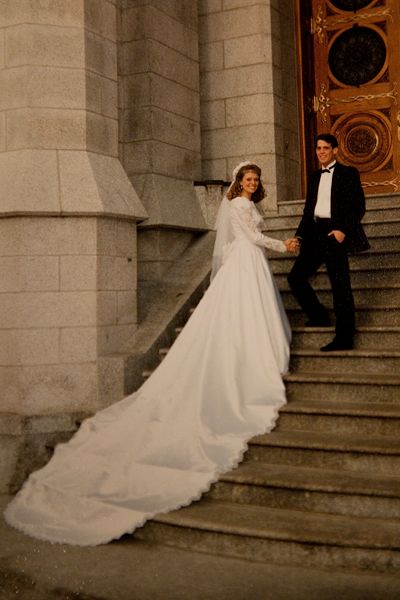
I thought I was Princess Diana herself. Evidenced here:

Photobucket

As a little girl, I was forever ruined when I saw Diana march up that exceptionally long aisle with a bridal train that was four miles long. I knew I had to have one just like it.

And, minus a few poofy ruffles, her short hair, and the ugly, cheating husband: I did.

As I watched the nuptials this morning, the little girl inside me who dreams of fairy tale endings, rejoiced. Tears fell down my cheeks, and I was powerless to stop them.

Today, a simple girl walked into a church as a commoner, and walked out as a princess.

It is the very thing little girls dreams of. It is the happy ending in every story we read to our daughters. It is the epitome of love and romance -- to marry your prince (whether he be an actual prince or simply prince-like). There is not a shriveled heart alive in the world today that doesn't find that captivating, romantic, and hopeful.

And, oh sweet fancy moses, the dress.

One look at it, and I made a frantic, early morning phone call to the Husband demanding that we get married again. Just so I could wear THAT dress.

He offered to let me pick a different groom, too. [I've got a few calls in to Hugh and Colin's people. I'll let you know how it goes.]

But it was stunning, simple, modest, classic, and elegant. I will love it forever.

Here's hoping the fairy tale ends the way they're supposed to -- a long life together, babies, lots of love, and no one named Camilla.

Mama, I shrunk myself!

The other day while ignoring my children practicing hands-off parenting, I was interrupted in my reverie when a vehicle ran over my foot.

I looked down and this was the sight I saw:

Photobucket

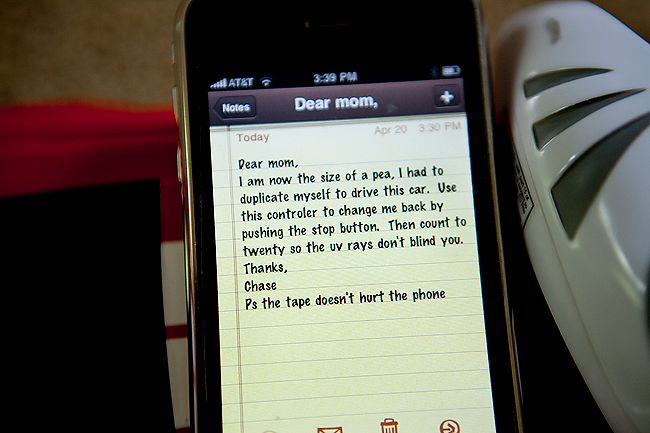
Closer examination revealed an important message on my cell phone:

Photobucket

[In case you are blind], it said:

"Dear Mom, I am now the size of a pea. I had to duplicate myself to drive this car. Use this controller to change me back by pushing the stop button. Then count to twenty so the uv rays don't blind you. Thanks, Chase P.S. The tape doesn't hurt the phone"

I thought long and hard before making any decisions. After all, a pea-sized child might not be such a bad thing. Lower grocery bills, someone to spy on any conversation I want to listen to, less pants to grow out of.

But then I envisioned my rather sumptuous rear end accidentally sitting on the poor kid. Or accidentally sucking him up with the vacuum.

And that made me cry.

So I decided I better bring him back to normal size. I obeyed the instructions, keeping my eyes shut tight to protect me from the deadly UV rays.

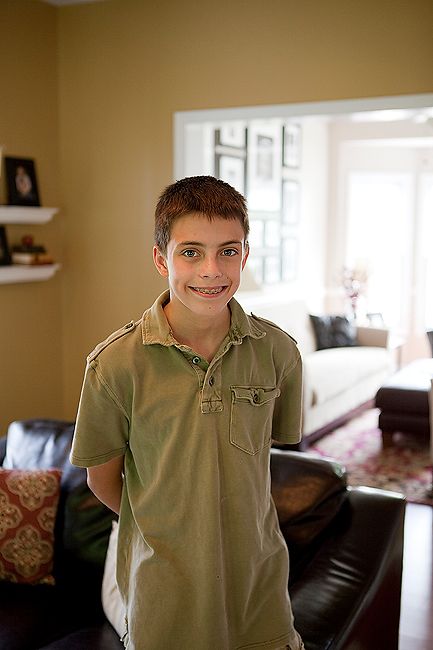
After the longest twenty seconds of my life, I opened my eyes, and this was the sight I saw:

Photobucket

I guess now would be a good time to return that pea-sized dollhouse I bought him to live in, eh?

How-To Tuesday: How to whiten teeth in photoshop


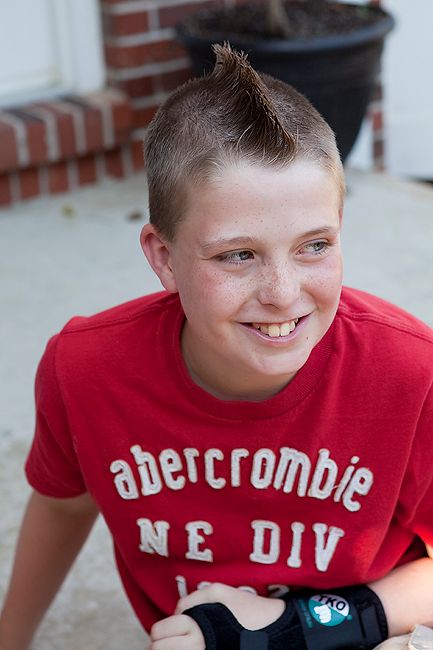
Let's say you have a photo of your son that you love. Your son and his awesome mohawk from last year. Only, since he is a kid, and not always as diligent as you'd like him to be, his teeth brushing has left something to be desired. Rather than live with the yellow not-quite-white teeth in the photo, I am going to show you how to fix it.

Photobucket

There about 9,459 ways in Photoshop to whiten teeth. I make no claim that this is THE one and only way. It's just the way I do it. And it takes less than a minute.

Step one: Open your image in Photoshop. I use CS3, but I believe it would work in Elements, as well as the newer versions.

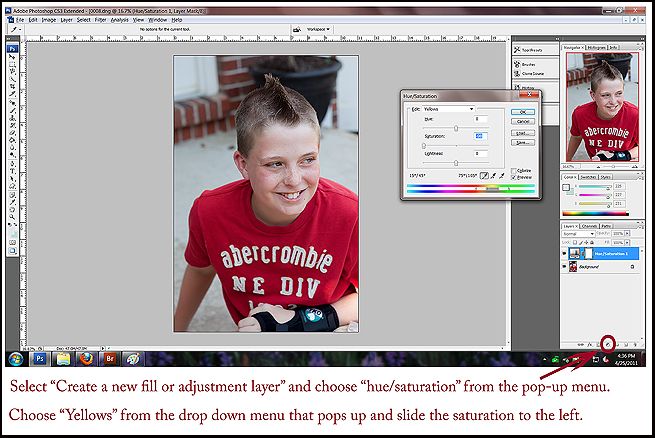
Select the yin/yang looking icon on the bottom right hand side to create a new adjustment layer. In the pop-up menu, select "Hue/Saturation."

When the Hue/Saturation dialogue box pops up, select "Yellow" from the pop-down menu, and turn the slider for saturation to the left until your teeth have no yellow in them. At this point, you will likely have ruined the rest of the photo, but take heart, we will fix it later. Just focus on the teeth. Click OK.

Photobucket

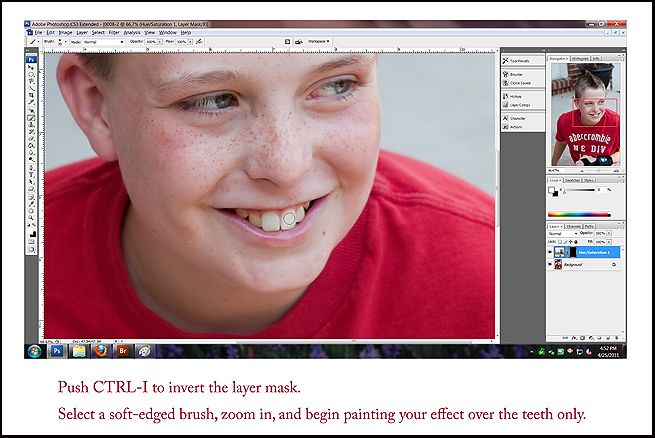
Zoom in until your screen is filled mostly with the teeth. Now you want to hit CTRL-I, which will invert the layer mask. We will then use our brush tool (just push letter B and it will shortcut to the brush). Choose a soft-edged brush and begin "painting" over the teeth. This paints our saturation adjustment layer back in - restoring the fix we did, but only in the areas we want (i.e., the teeth). If all looks okay to you, merge down your layers.

Photobucket

Still with me?

Good. You can do this. While the teeth look considerably less yellow, they lack any whiteness or brightness to them. We want to fix that.

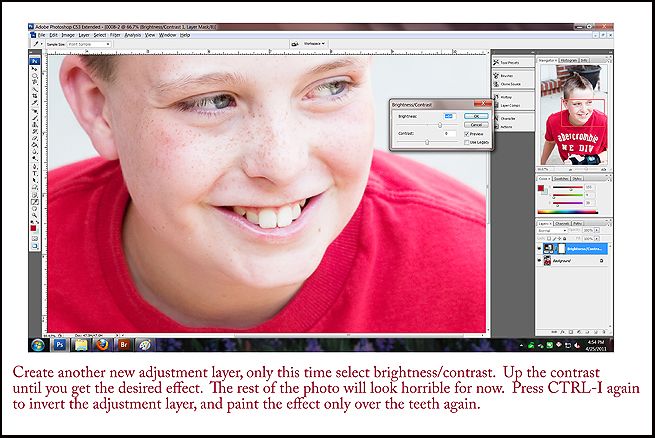
Create another adjustment layer, this time click on "Brightness/Contrast" from the pop-up menu. In the dialogue box, you want to take your brightness slider and move it to the right. Don't panic when your whole image starts to look wrong. It's all about the teeth right now. We'll fix the rest later.

Once your teeth look nice and bright, select okay.

Photobucket

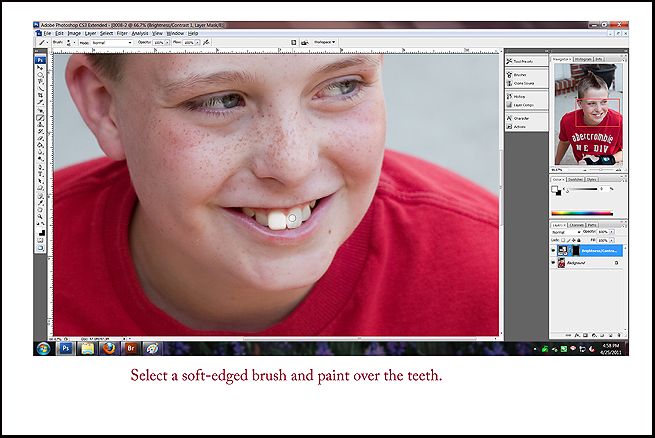
Then hit CTRL-I again to invert the layer. Select your brush tool (B) and paint over the teeth again.

Photobucket

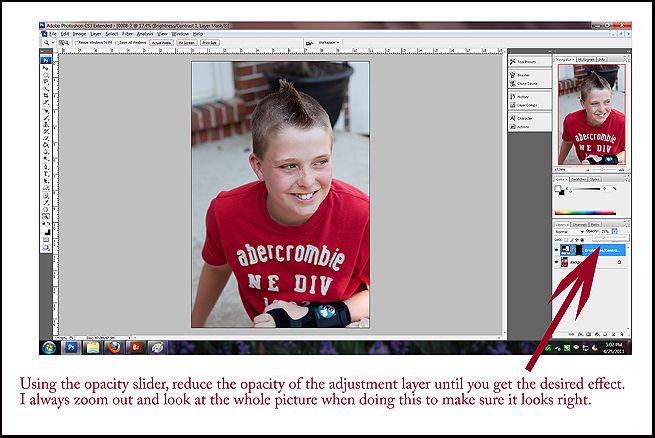
They will likely look horribly white - too white. Zoom out until you are looking at the whole picture. Then take your opacity slider on the brightness/contrast adjustment layer and reduce it until it looks right to you. For me, that number is usually around 25-35 percent. Do what looks best on your photo. Neon white teeth? Not so good. But we want to pop the brightness just a bit. Then merge the layers down.

Photobucket

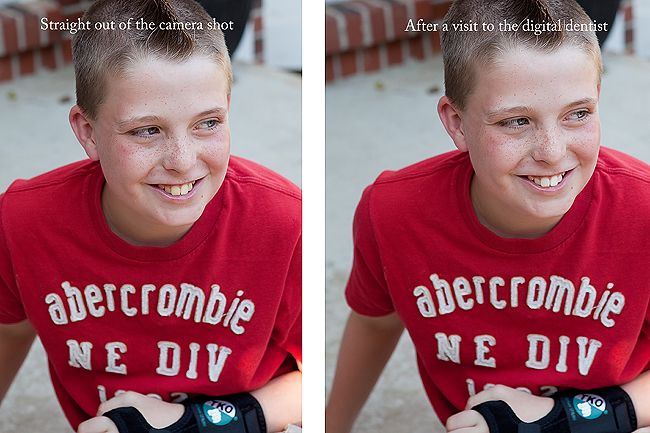
And that's it! It sounds way more complicated than it actually is. And here is our SOOC (straight out of the camera) shot and the edited version. The difference is subtle, but that means we didn't overdo it in editing. A nice, white smile that doesn't look like we photoshopped the crap out of it.

Always a good thing.

Photobucket

Your turn. What can you teach me today?

Mister Linky's Magical Widgets -- Easy-Linky widget will appear right here!
This preview will disappear when the widget is displayed on your site.
For best results, use HTML mode to edit this section of the post.